
Verify your counts to avoid running out of product or ordering too much!
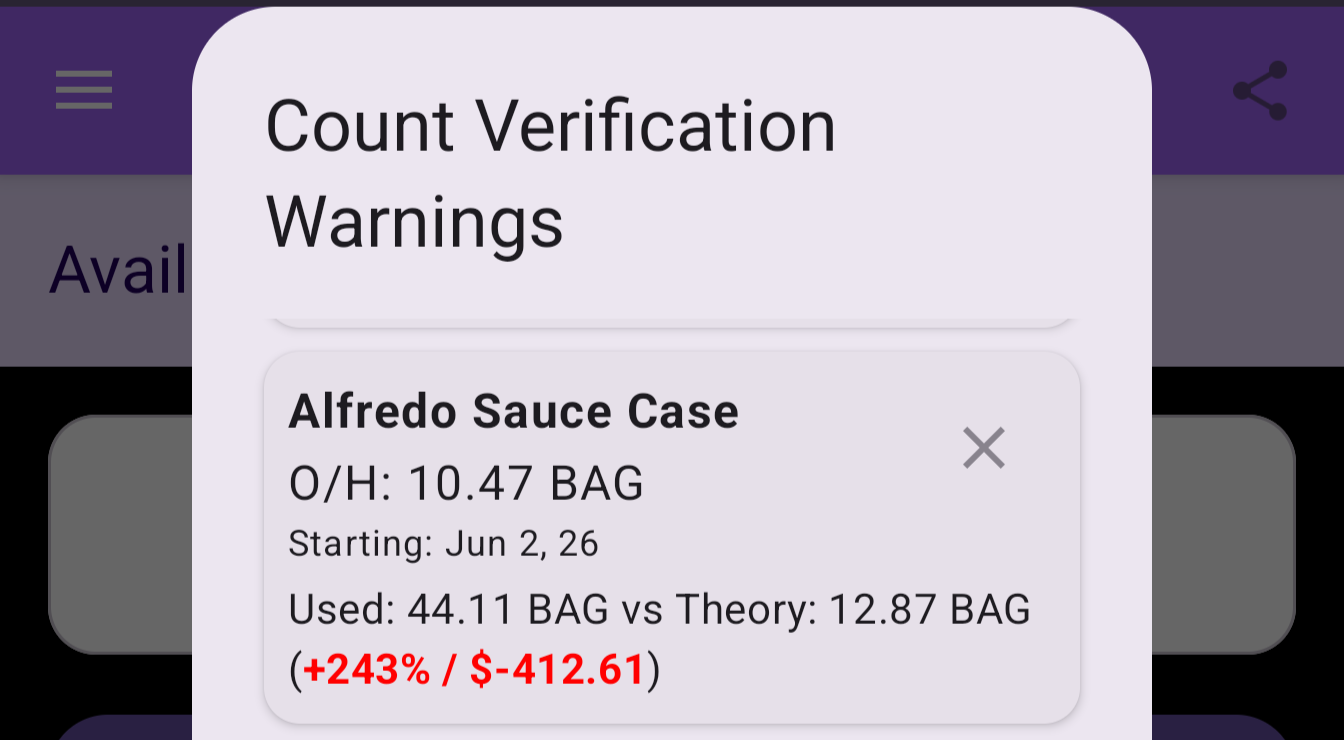
Miscounts and/or fat-finger entries are one of the top issues when counting stock. By utilizing the verification report you can see obvious mistakes when your usage vs theory is out of whack!
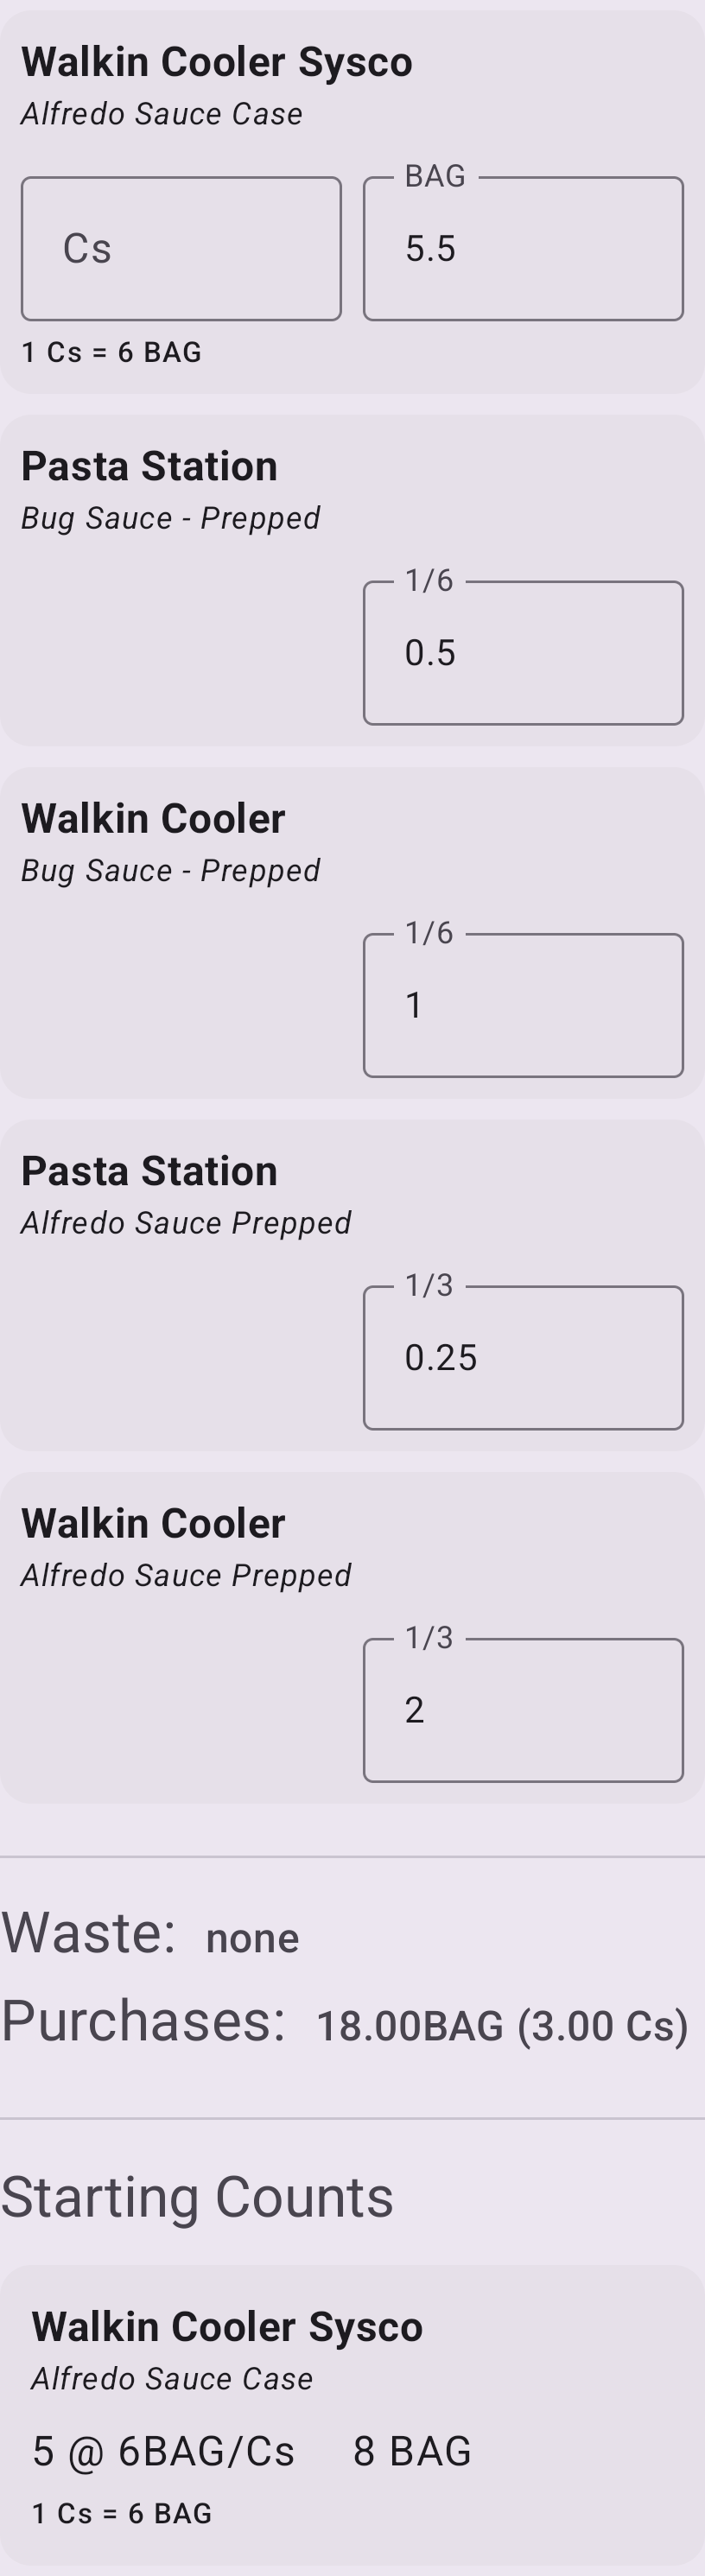
Once you have clicked the verification item, you can review your counts to identify the problem.
Purchased items show you the count of all products using said item.
By reviewing this report, you can see your starting count, what purchases have been made in the period and your ending count.
In this example, you can see that the 5.5 bags counted should have actually been 5.5 cases counts.
You can adjust your quantity on hand for todays counts instantly from this report!
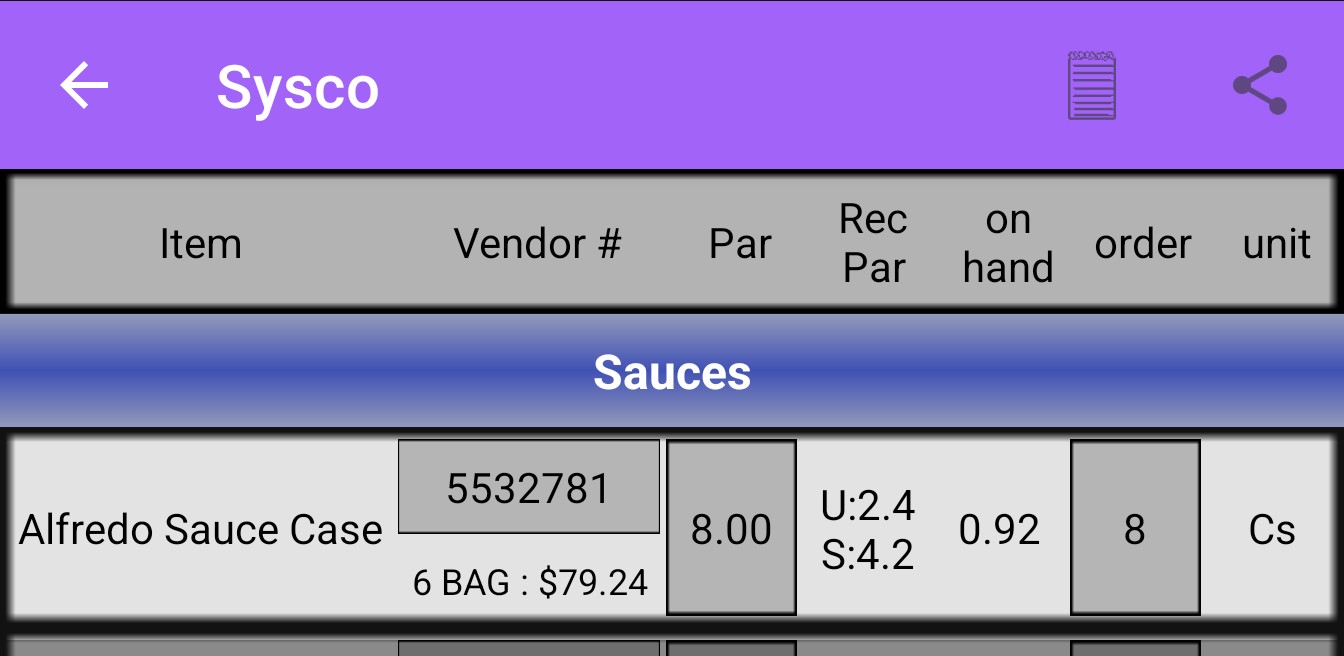
It is always a smart move to review your order prior to uploading it to your vendor.
Here you can see your preset par as well as 2 recommended pars, one based on your usage and one based on your sales (if sales are being imported).
By reviewing these numbers along with your on-hand amount, you should be able to recognize that your count may not be accurate if your amount to order looks high.
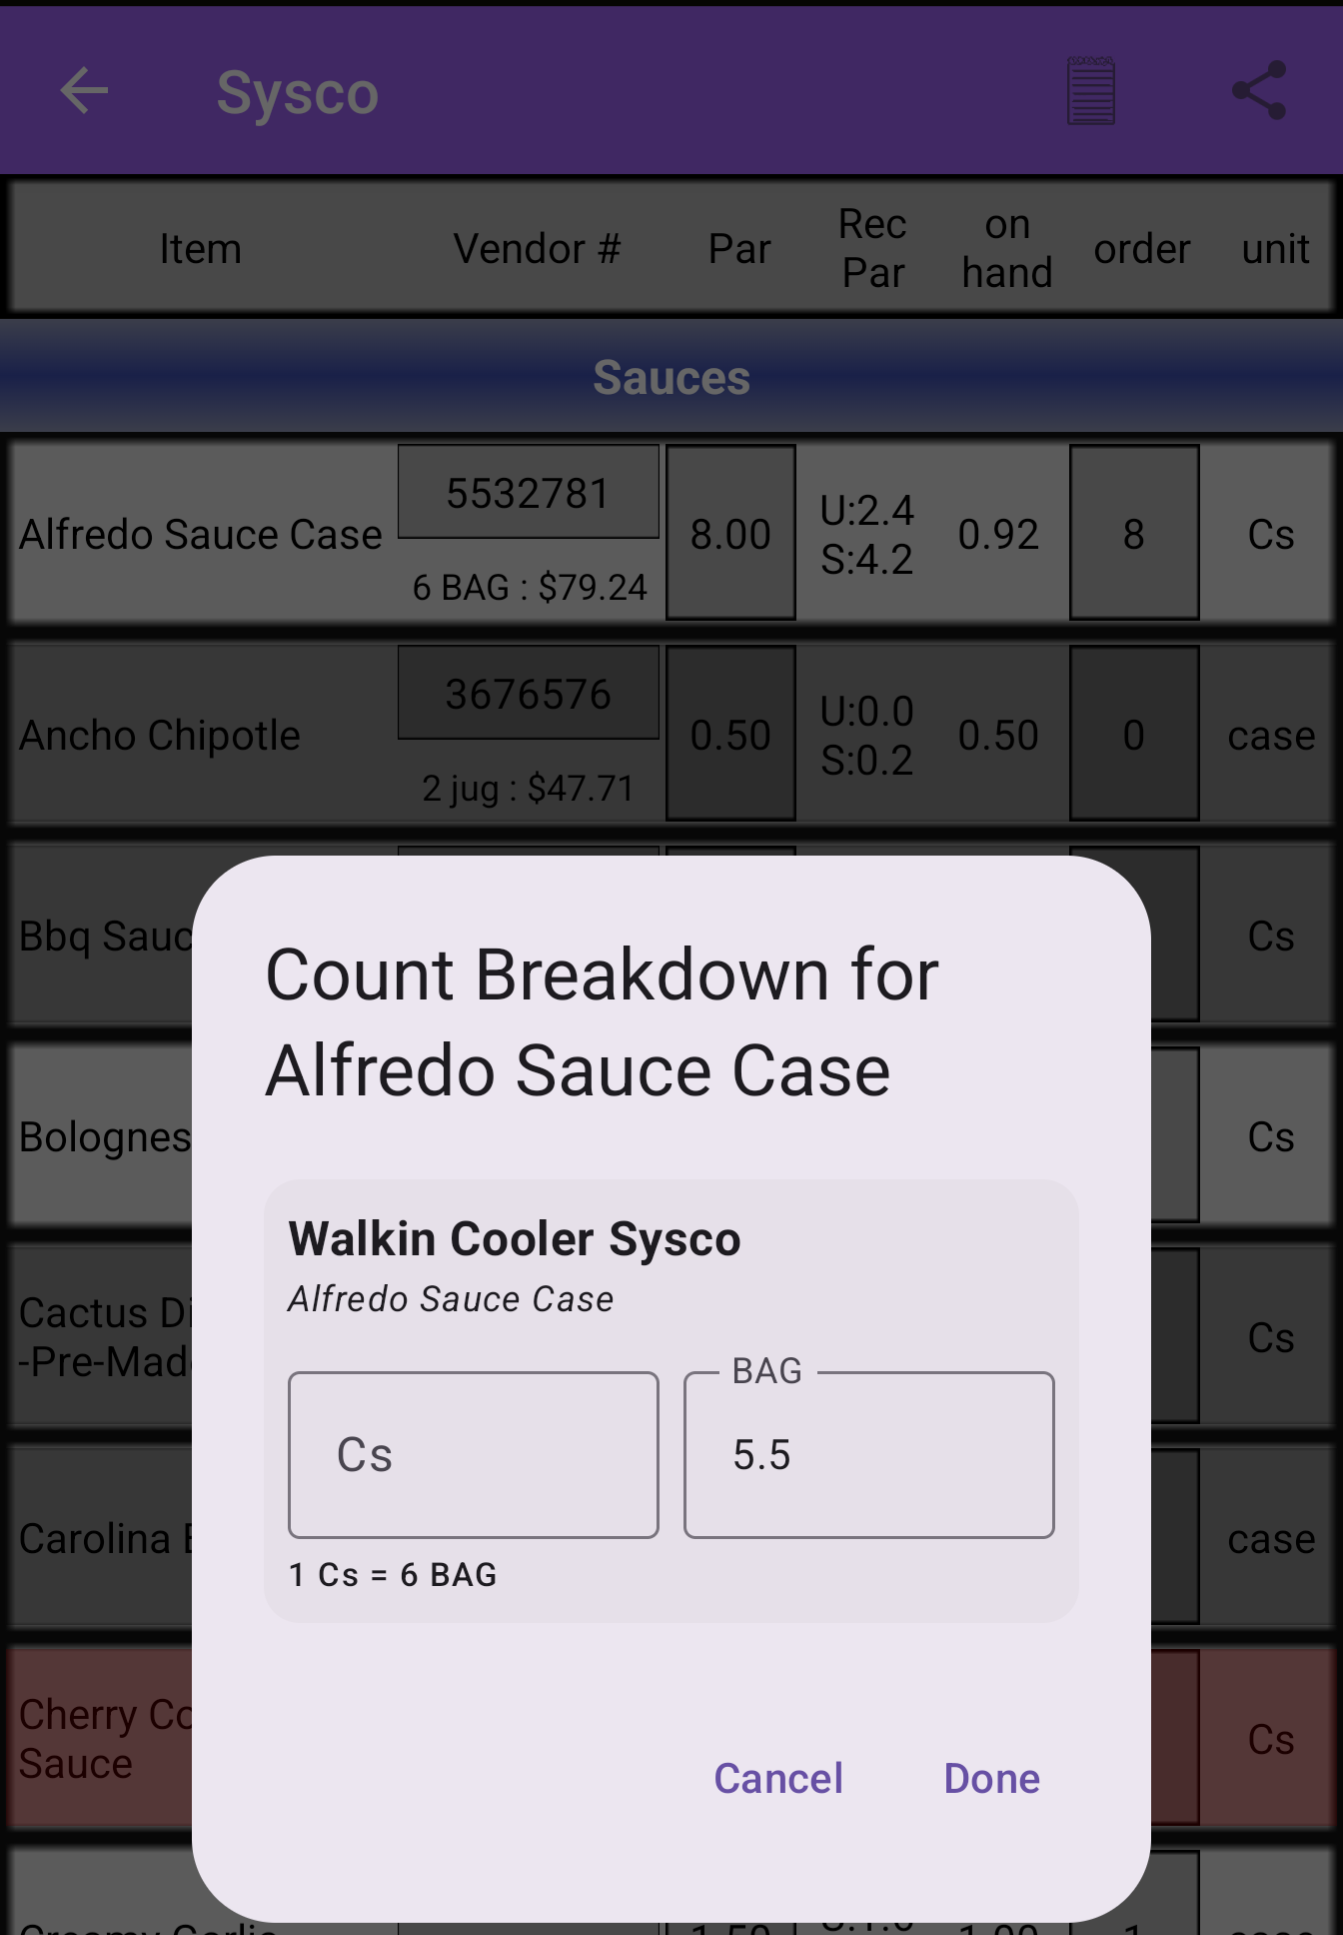
If you missed the item on the verification report and you think the count may be wrong, you can tap the item here as well to bring up your counts.
This screen will only show you the purchased items counts so you can easily identify scenarios where items may have been counted incorrectly.
When you adjust your counts here, your amount to order will automatically update!